How to Grow Meconopsis From Seed
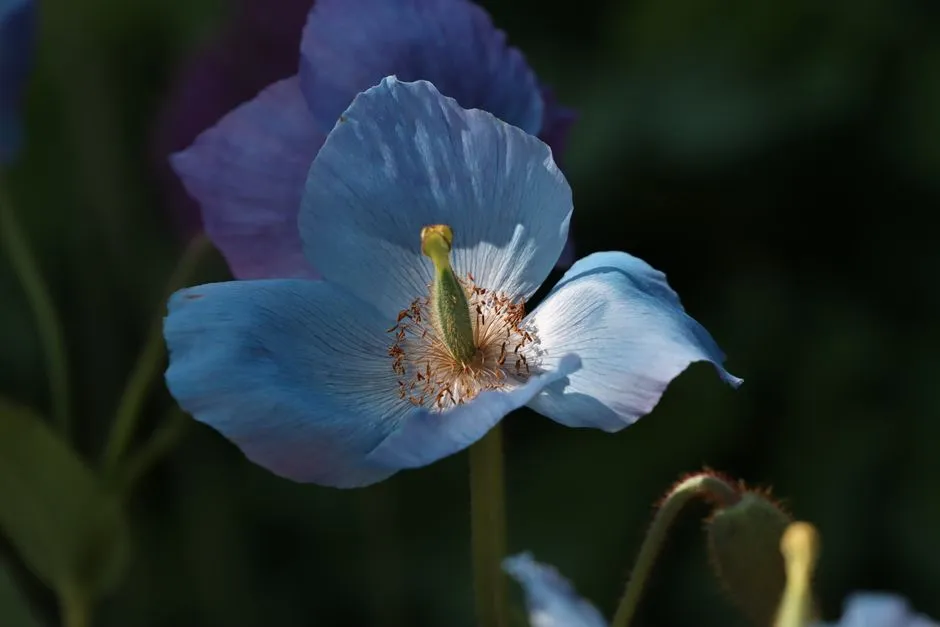
- How do you grow Meconopsis from seed?
- Start with the exact seed name
- Choose between two honest sowing windows
- Store seed without inventing a treatment
- Prepare an airy, clean sowing mix
- Surface-sow so light reaches the seed
- Sow thinly to protect the seedlings
- Give cold and moisture without turning the pot stagnant
- Move from germination to seedling care
- Diagnose the tray by pattern
- Keep a one-pot seed record
- A complete sowing-day checklist
How do you grow Meconopsis from seed?
Grow Meconopsis from seed by first identifying the species or hybrid and following its packet instructions. Use a clean, free-draining, airy sowing mix; surface-sow because the seed needs light; keep the pot shaded, cool, moist but never sodden; and expect the schedule to depend on the taxon. Sow fresh seed in late summer or autumn, or store it cool and dry for a late-winter sowing.
That is the framework, not a guarantee. Meconopsis is a varied genus, and advice that works for a fertile blue hybrid may be wrong for a smaller high-altitude species. Keep the label with the pot and treat the first batch as an observation, not a referendum on your gardening character.
Start with the exact seed name
Write down everything on the packet before opening it:
- Botanical name as supplied
- Cultivar or group name, if present
- Supplier or seed-exchange source
- Harvest or packing year
- Any stated sowing exception
- Number of seeds, if practical to count
- Date received and storage conditions
“Blue poppy seed” is not enough information. The Royal Horticultural Society describes Meconopsis as a genus of nearly 80 species, including short-lived and monocarpic plants. Monocarpic means a plant flowers once and then dies. Some named plants are fertile and seed-raised; others are maintained by division rather than seed.
The RHS Meconopsis growing guide notes, for example, that ‘Lingholm’ belongs to the Fertile Blue Group, while ‘Slieve Donard’ is in the Infertile Blue Group and is propagated only by division. Seed sold under old or broad names may also produce variable plants. Buy from a source that identifies the material as precisely as it can.
For the plant's longer-term site needs, use the Himalayan blue poppy growing guide. This page stays with the seed-to-young-plant stage.
Choose between two honest sowing windows
Two respected sources frame the timing differently, and both make sense within their stated systems.
Route A: sow fresh seed in late summer or autumn
The RHS says late-summer and autumn sowing gives its best germination, in about three weeks, but the resulting seedlings need protection through winter in a cold frame or similar place.
Choose this route when:
- The seed is fresh and correctly identified.
- You have a cool, shaded, protected place for young seedlings.
- You can monitor moisture through autumn and winter.
- The packet does not specify a different treatment.
The three-week figure is an RHS example, not a deadline for every seed lot. Do not discard a labelled pot merely because one calendar estimate passed.
Route B: store carefully, then sow in winter or late winter
The RHS also describes February sowing after cool, dry refrigerator storage. This gives young plants a growing season to develop. The Meconopsis Group's propagation-from-seed guidance says most seed is normally sown from December to February so it experiences winter conditions.
Choose this route when:
- You received seed after the fresh-sowing window.
- Winter protection for tiny autumn seedlings is difficult.
- Your named taxon and supplier guidance support winter sowing.
- You can store the seed without moisture reaching it.
The Meconopsis Group names exceptions: it says M. punicea, and possibly M. quintuplinervia and M. delavayi, should be sown as soon as possible after harvest. Follow the named seed's current specialist instructions rather than applying a blanket refrigerator routine.
Store seed without inventing a treatment
The RHS calls Meconopsis seed short-lived and advises cool, dry refrigerator storage for seed held until February. The Meconopsis Group gives a more detailed seed-saving method: cleaned, dry seed in labelled paper packets, placed inside a waterproof bag or container, then stored in a refrigerator at about 4°C as soon as possible after harvest.
Keep “dry” and “cold” as separate controls:
- Label the inner paper packet.
- Keep the packet dry.
- Place it inside a sealed moisture barrier.
- Record the storage date and location.
- Do not confuse storage with moist stratification unless the supplier specifically directs that treatment.
A refrigerator can be humid and frequently opened. The waterproof outer container protects the dry packet; it does not mean the seeds should sit loose against condensation.
The Meconopsis Group also describes longer freezer storage after complete drying with silica gel. That is a specialist preservation route, not an automatic extra step for a packet you intend to sow this season.
Prepare an airy, clean sowing mix
The RHS supplies a clear starting formula:
- Two parts multipurpose peat-free compost
- One part perlite
- Pass the mixture through a sieve
For a small measured batch, combine 400 millilitres of compost with 200 millilitres of perlite. That preserves the 2:1 ratio and makes 600 millilitres before settling. Mix evenly rather than building layers.
The Meconopsis Group does not insist on the same ingredients, but it agrees on the function: high air porosity. It suggests fine grit or pumice and says a squeezed handful of damp compost should fall apart when released.
Use a mix intended for seed starting, not garden soil. University of Minnesota Extension's damping-off guidance explains that garden soil can introduce pathogens into the wet conditions used for germination. It recommends clean or sanitized containers, new potting mix, good drainage, clean tools, and moisture without sogginess.
Containers must have drainage holes. Wash reusable pots and trays, then sanitize them using the Extension method or an appropriate labelled product. Never mix cleaning chemicals. Follow product labels, protect skin and eyes as directed, and keep chemicals away from seed and growing media until equipment has been properly rinsed or dried under those directions.
Surface-sow so light reaches the seed
Meconopsis seed needs light to germinate, according to the RHS. Fill and settle the container gently, water the mix if needed, and let excess water drain before sowing.
Then:
- Divide the seed into visible small groups on a contrasting sheet of paper.
- Distribute it across the surface rather than tipping one heap into the centre.
- Press only enough to establish contact with the moist surface.
- Do not bury the seed under compost.
- Label immediately with name, source, and date.
The RHS offers two ways to anchor exposed seed: a very thin layer of vermiculite, or a surface of damp perlite into which the seed is sown. The Meconopsis Group says growers differ over whether to add grit; if used, it should be fine and very thin.
If you have enough seed, compare methods rather than arguing with the packet. Divide one identified lot evenly: half with the thin cover recommended by your chosen method and half uncovered. Keep every other condition the same and label both.
Sow thinly to protect the seedlings
Crowding keeps surfaces wet and makes later handling harder. The Meconopsis Group calls one seed per square centimetre dense enough and gives 80 seeds in a 9-centimetre pot as its example. The point is a low sowing density, not squeezing exactly 80 seeds into every circular pot.
The RHS takes another practical route: place a tiny pinch of three to five seeds in each module of a plug tray. The resulting small group can be potted on together, reducing the losses that can occur while separating delicate seedlings.
Choose the format by seed quantity and confidence:
| Situation | Container strategy |
|---|---|
| Few valuable seeds | Individual modules or carefully spaced surface sowing |
| Enough seed for a comparison | Two labelled pots with one variable changed |
| Concern about root disturbance | Three-to-five-seed modules, following the RHS method |
| Unknown identity or mixed packet | Separate pots by packet; never combine lots |
Record the number sown where possible. Germination then becomes “7 of 20 emerged,” not “the pot looked encouraging.”
Give cold and moisture without turning the pot stagnant
The Meconopsis Group's general winter method says the seed does not require heat. It advises a shady position, no full sun, moisture without saturation, airflow around the pots, and protection from excess rain from above. An unheated greenhouse or a protected outdoor position may provide that combination in a suitable climate.
Do not translate “cold” into a household-freezer experiment with a wet pot. Do not translate “moist” into a sealed, waterlogged container. Use the taxon-specific method and your actual climate.
Check the pot on a schedule and after weather changes. Observe:
- Surface moisture
- Weight of the container
- Drainage through the base
- Algae, moss, or liverwort development
- Condensation under any cover
- Seed movement after watering
- First emergence
Water gently enough that tiny surface seed does not wash into one corner. If the container is already heavy and the surface remains moist, adding water by habit is not care.
Move from germination to seedling care
Once seedlings emerge, preserve the same balance: shade, moisture, drainage, and airflow. The Meconopsis Group says seedlings should never dry out but should not remain sodden. The RHS likewise warns that both excessive wetness and dry conditions can be fatal.
Cotyledons are the first seed leaves. True leaves are the next leaves that begin to show the plant's characteristic form. Do not rush to separate seedlings at the cotyledon stage.
The two sources offer compatible but slightly different handling cues:
- The RHS says seedlings can be pricked out when the first pair of true leaves develops.
- The Meconopsis Group says two or three proper leaves, not cotyledons.
Use the more cautious cue when seedlings are tiny or conditions are unstable. Prepare the receiving mix and labels first. Hold seedlings by a leaf rather than squeezing the stem, disturb roots as little as possible, and move small module groups together if that was the point of the sowing method.
The RHS advises a weak liquid feed every fortnight for transplanted seedlings during the growing season. The Meconopsis Group also says young plants are hungry and should not remain pot-bound. Use a product labelled for the plant and stage, follow its dilution directions, and do not feed a wet, collapsing, or newly germinated tray in an attempt to force recovery.
Diagnose the tray by pattern
| Observation | First interpretation to test | Next action |
|---|---|---|
| Nothing has emerged | Timing, seed viability, treatment, or moisture may differ | Keep the label; verify species instructions and dates before discarding |
| Seed washed into clusters | Water application displaced surface seed | Use gentler watering and record the affected areas |
| Green surface growth dominates | Surface remains persistently moist with limited airflow | Improve airflow and watering control without drying seedlings |
| Seedlings narrow and collapse at soil line | Possible damping off | Isolate the tray; stop splashing between pots; review sanitation and moisture |
| Seedlings scorch or bleach | Light or exposure may be too strong | Move to bright shade consistent with the species guidance |
| Seedlings wilt while mix is dry | Moisture loss | Rehydrate gently and revise check frequency |
| Seedlings remain small in crowded modules | Competition or pot-bound roots may be involved | Pot on at the source-supported true-leaf stage |
Damping off is not simply “too much water.” Minnesota Extension explains that several pathogens cause it and lists water-soaked, thin, discoloured stems, poor emergence, wilt, root damage, and sometimes fungal growth among the signs. Infected seedlings rarely recover well. Remove severely affected material, avoid moving contaminated water or tools between trays, and restart with clean equipment and fresh mix when necessary.
Keep a one-pot seed record
Use one row for every identified lot:
| Field | Record |
|---|---|
| Name on packet | |
| Source and harvest/packing year | |
| Storage method and dates | |
| Sow date | |
| Container and mix | |
| Surface covering | None / vermiculite / fine grit / other directed method |
| Position and protection | |
| Number sown | |
| First emergence | |
| Number emerged | |
| First true leaves | |
| Pot-on date and losses | |
| Notes for next batch |
Photograph the label beside the pot at sowing and first emergence. If the plant later differs from the packet description, preserve the supplier name rather than quietly upgrading the identification.
A complete sowing-day checklist
- Exact seed name and source recorded
- Species-specific exceptions checked
- Correct fresh-sow or stored-sow window chosen
- Used containers cleaned and sanitized
- Fresh, airy, free-draining mix prepared
- Container drainage confirmed
- Mix moistened and excess water drained
- Seed surface-sown at low density
- Only a source-supported thin anchoring layer used
- Permanent label added
- Cool, shaded, ventilated position ready
- Rain and drying risks considered
- Check schedule entered in the calendar
The seedling stage rewards restraint. Give the seed light, air, steady moisture, accurate labels, and time. Then let the record—not the optimistic memory of a blue flower on the packet—tell you what worked.